


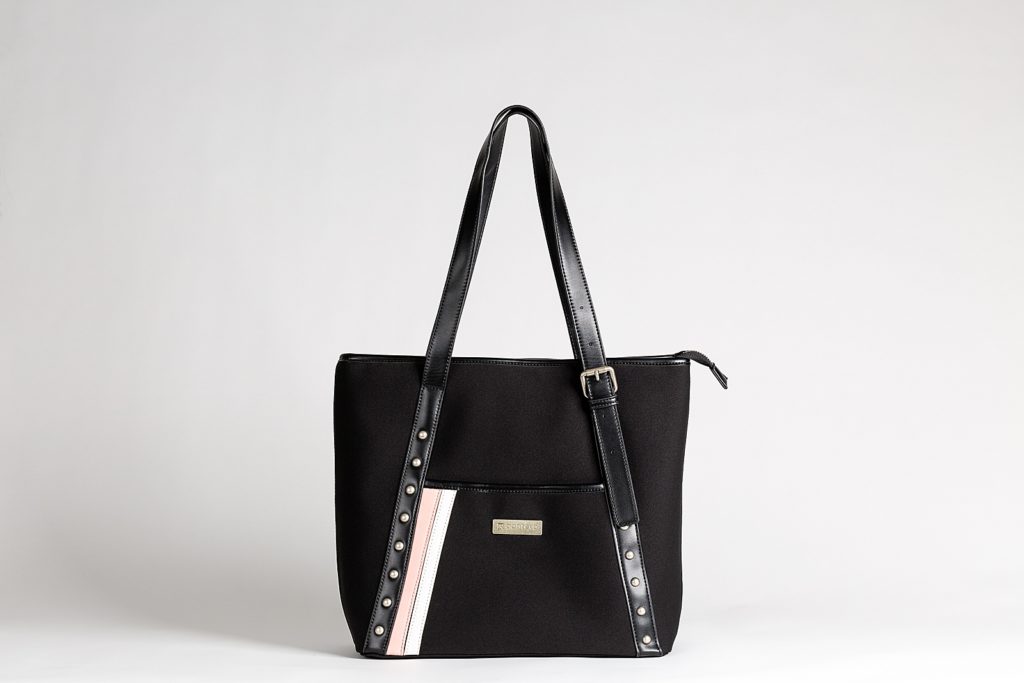
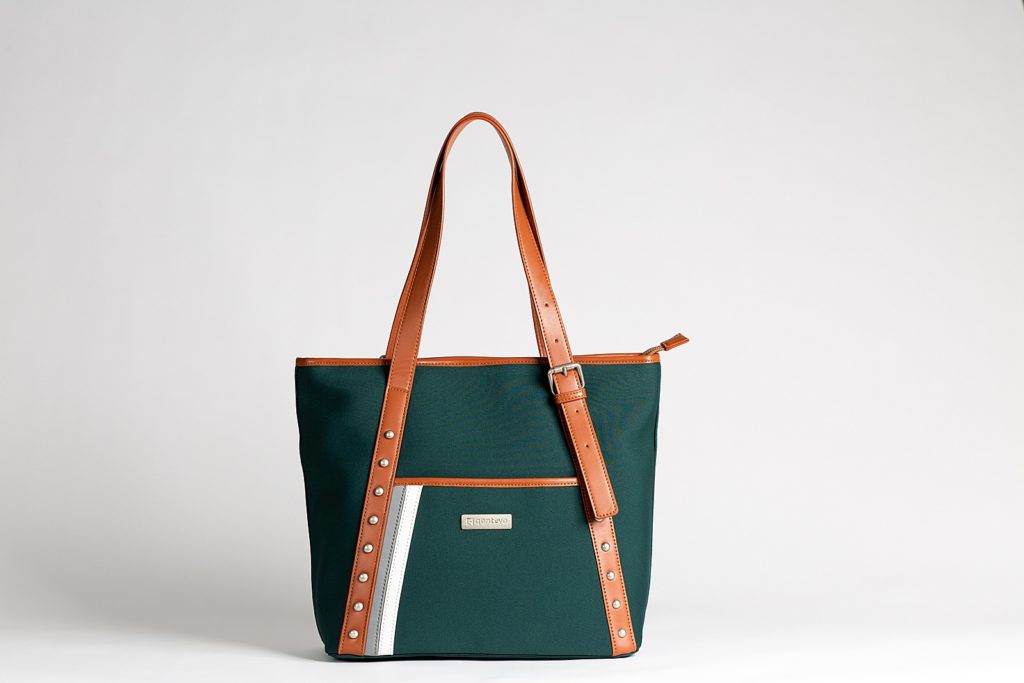
We recently had the honor of photographing new products for our amazing client, Qontevo! We’ve loved working with Sarah, Founder of Qontevo, on various projects from capturing e-commerce product photos for her styling lunch bags and utensils to Creative Directing and Photographing branded lifestyle content to represent her brand on her website and social media platforms. This project was no different, especially since we got get feast our eyes on her newest bags and colors for her fall launch!!
Shooting objects like handbags can be a bit tricky, but we’ve learned a few tricks along the way that make the life of a product photographer a LOT easier. So today, we’re dishing on our best Tips for Shooting Handbags for E-Commerce!
FLUFF AND STUFF
If you work with any product made of fabric that’s intended to hold things inside, you’ll likely realize that most fabrics don’t allow a bag to sit perfectly upright and look full and flattering as you’d hope they would. More often, the bags want to succumb to the effects of gravity (you know, the same thing constantly working against that wrinkle free facial complexion you hope to keep forever <— Not alone here, right!?)
Instead, the bags kind of fall all over themselves like Jon on a dance floor and look lumpy, frumpy and grumpy. (Side note: grumpy might actually just be the emotional side effect we feel when looking upon lumpy and frumpy).
So, how does a motivated product photographer overcome this horrendous situation? Simple. You gotta fluff and stuff!! We fill the bags full of bubble wrap, packing paper, and whatever else we can find to fill them out and give them shape.
The key here is not to get carried away. Too much stuffing can definitely work against you and make the bag look even more lumpy, so just try to find the right combination that works for the product and fills it out without creating an excess.
PRO TIP: Of these, our favorite solution is bubble wrap, especially for bags like these, because it can be rolled to fill the bag, but still leaves a smooth surface. To achieve this, roll it with the bubble facing inward!
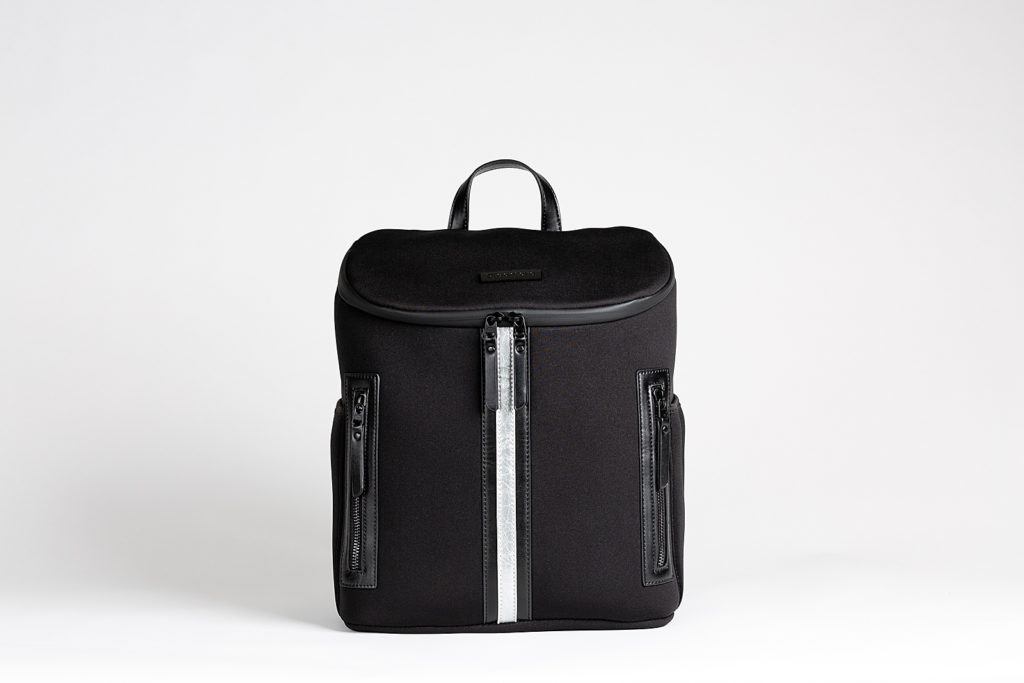
Here’s a photo of a bag stuffed with bubble wrap to keep it’s shape and posture:
GO FISH
Another strategy we use involves one of Jon’s favorite past times…fishing! Fishing line makes for a great tool to use when you are shooting products like these because it is translucent and doesn’t show up very much in the photo and can be easily removed in post processing when and where it does.
Here’s how we used fishing line on this shoot:
– Holding Handles –
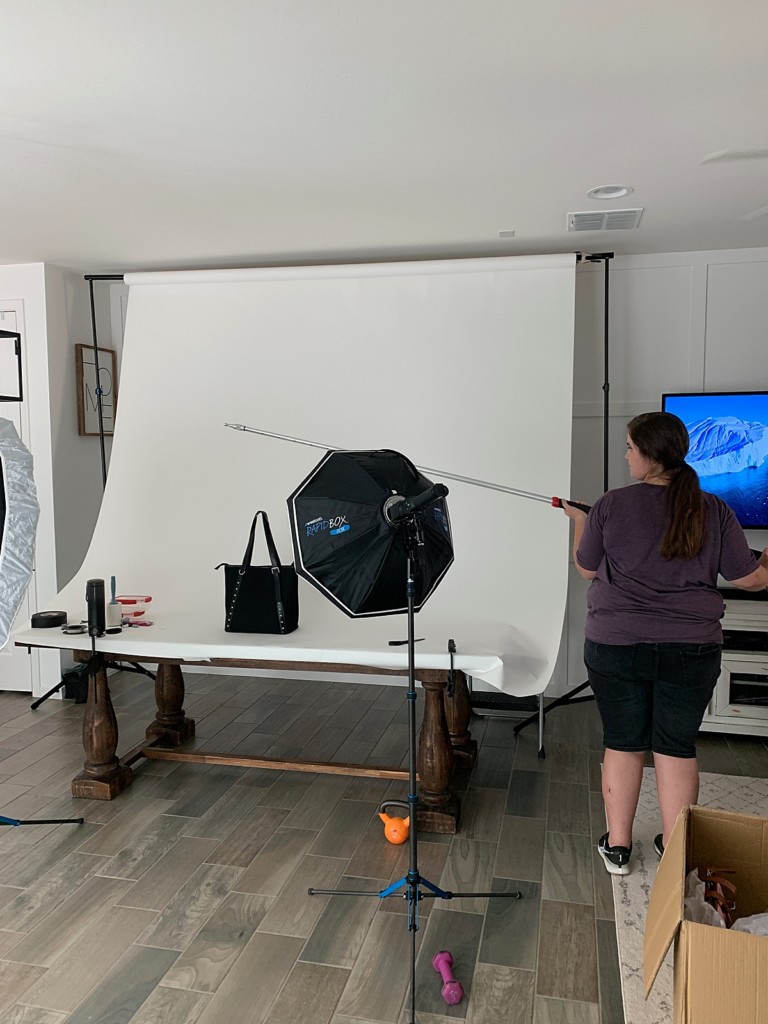
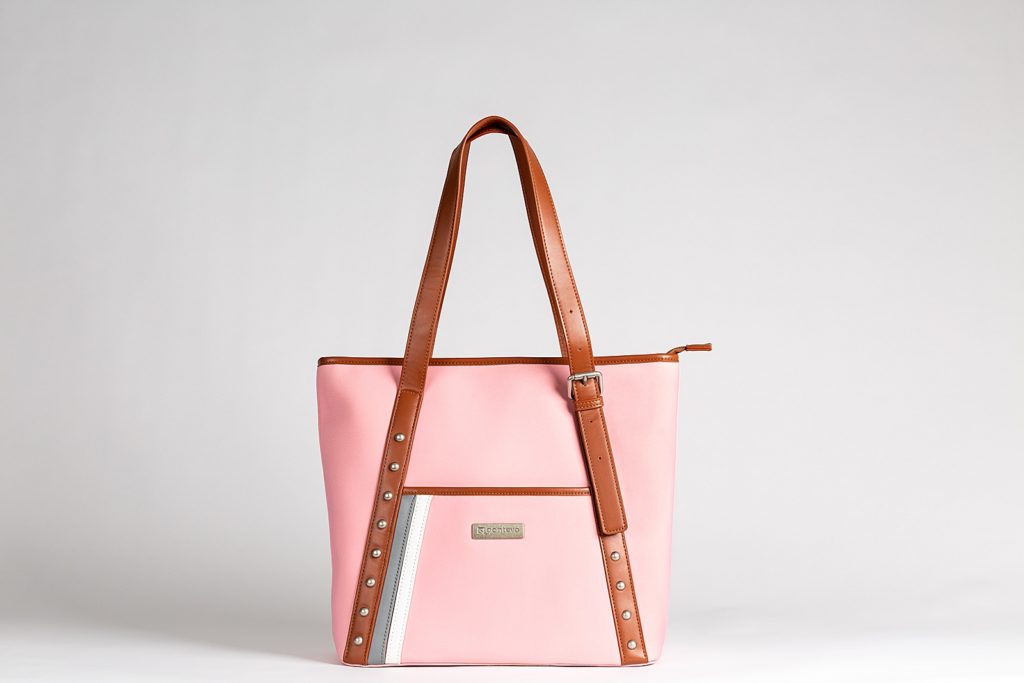
For Qontevo’s newest bag design, the Ivy Tote, we wanted to show the gorgeous hand straps in full detail, but gravity was working against us again! In order to show the length and form of the handles, we broke out the fishing line and a painter’s pole to rig up a solution!
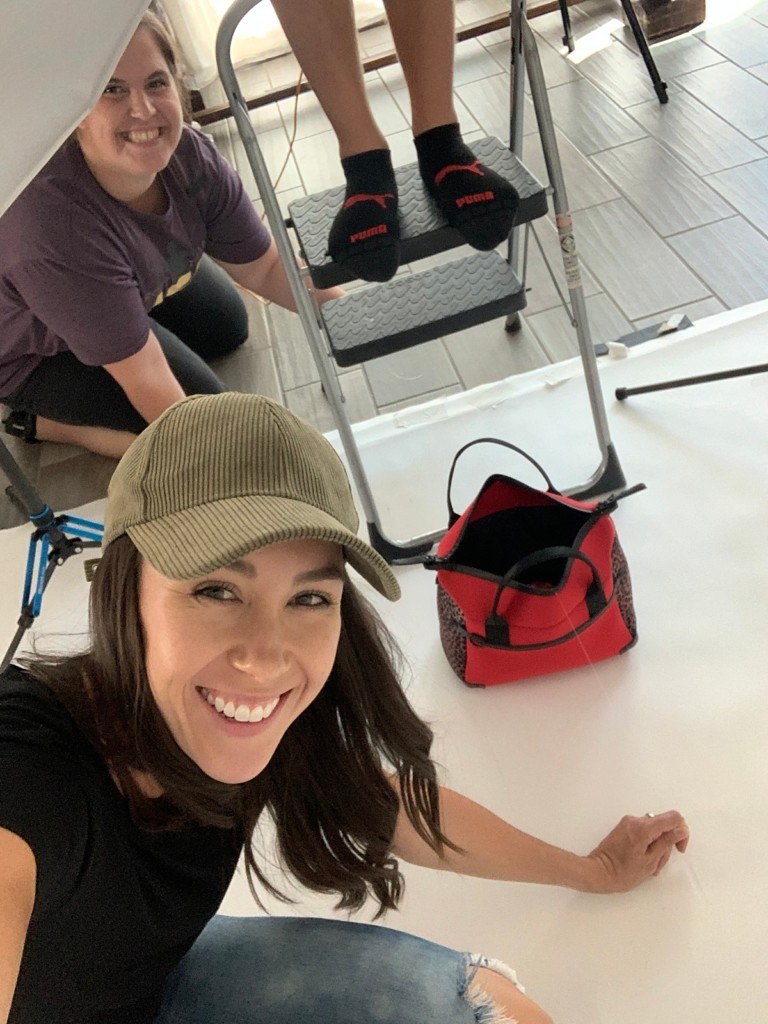
Our amazing assistant, Crystal, put on her fisherwoman’s hat and fished away for us, holding those straps up in perfect placement for the most flattering product photo!
We replicated this process across all of the Ivy Tote handbags. Here’s the BTS of the shot and the final images below it!
PRO TIP: If you use fishing line for an application like this, tie the line off above the handles. One single strand of fishing line is easier to remove from the final photo than an entire knot!
– Propped Open for Props –
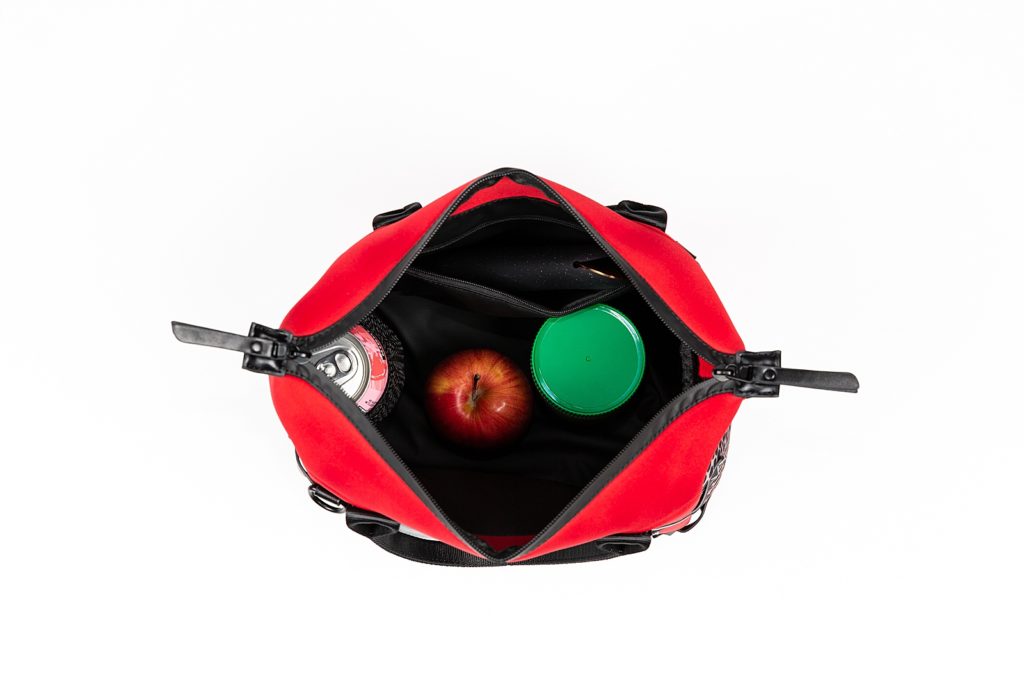
Another truth about handbags is…they are meant to keep things inside. Meaning, they don’t just ‘stay open’ on their own very easily. Than can make things tricky when you’re trying to capture photos of the product with items styled inside. The purpose of these images was to show the capacity of the bag and give an idea for the features inside, so we again turned to fishing line to solve all of our problems!
We used a needle and some fishing line to carefully thread the fishing line through the seam between the zipper and the bag. Then, we tied it off and cut a length off for us to hold on to. Finally, our incredible assistant, Crystal, and Erica carefully held open the bag for the overhead photo.
Check out the BTS photo and the final images below!
PRO TIP: Make sure that if you are using this trick on a product like handbags, the spot you thread through needs to be in the center. If we threaded ours off center and pulled the bag open, it wouldn’t have looked as symmetrical as these images do.

That’s a wrap, folks…this one’s in the bag!! <<—Pun intended! Happy shooting, friend!

Comments +