


We used to look at people who shot tethered and think to ourselves, “Woah, no thanks!” But we still wondered how to shoot tethered. It seemed like the most complicated ordeal that introduced way too many variables for things to go wrong with no real added benefit to us as the photographers.
Well, we couldn’t have been more wrong!
Jon was the first of us to fall in love with the idea of tethering, but it was still a little scary at first. The funny thing is, there really is nothing scary about it at all, except for the fact that we are all creatures of habit and anything new always seems a little scary at first, right?
And added benefits to the photographer? – they’re huge!! Being able to see images instantly on a 15” or larger monitor and make corrections on the fly is just one of the things we love. Our clients love it too – oftentimes the Creative Director loves seeing the images when we tether so that they can give creative input as well, ensuring we deliver images that they are over the moon for! Oh, and that’s not to mention being able to apply image corrections as new images come in live, or the added benefit of rating and culling as you go! So, you ready to learn about shooting tethered?
Good! Because we’ve heard from many of you asking for a step by step guide to tethering, we decided that’s exactly what we should do! Below you’ll find a step-by-step guide to shooting tethered complete with photos and links to our favorite tethering products!
What You’ll Need
First things first, let’s chat about the equipment you’ll need to purchase in order to start shooting tethered. Here’s the exhaustive list:
Haha, yes, you read that right, that’s all you’ll need! Of course, you’ll need your camera, computer, and an external drive if you wish, but you probably already own those 🙂
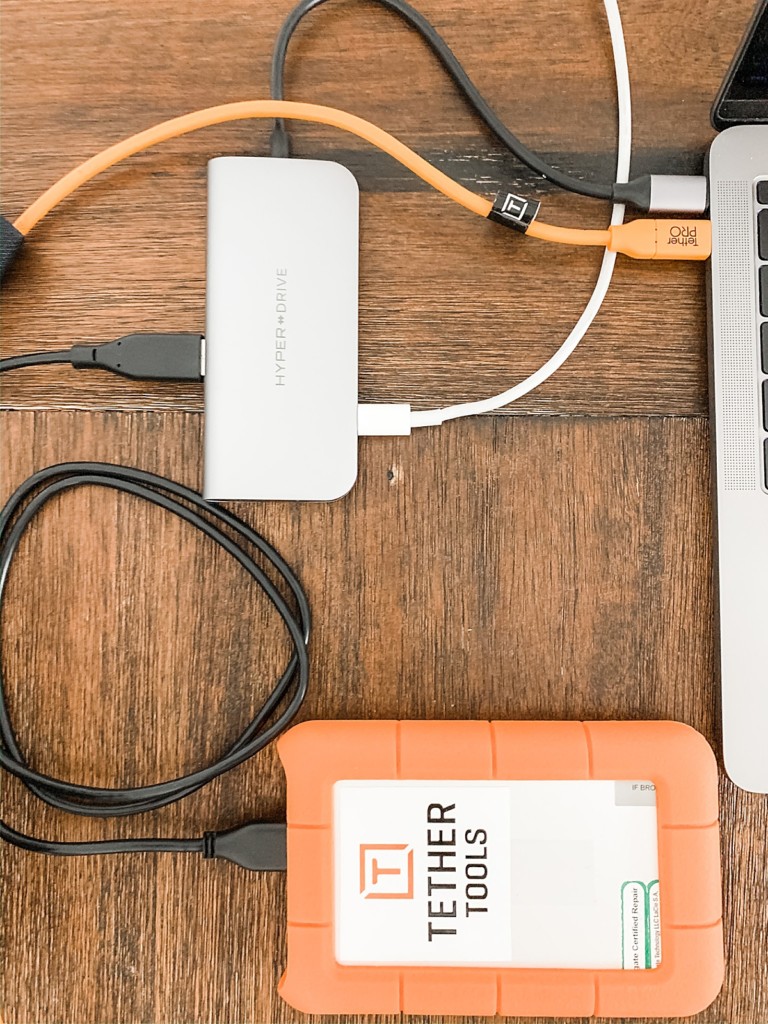
Here’s our exact tethering set up:
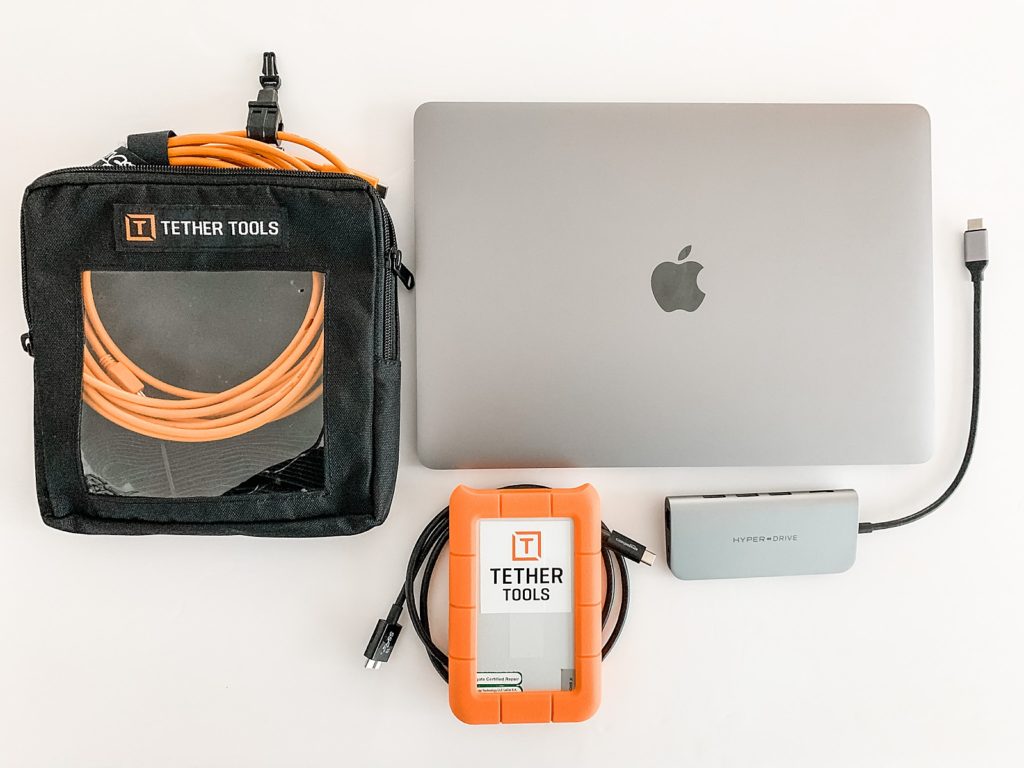
Pictured above: Tether Tools Starter Kit, LaCie 1TB External Drive, Hyper-Drive Multi-Adapter, MacBook Pro
Setting Up to Shoot
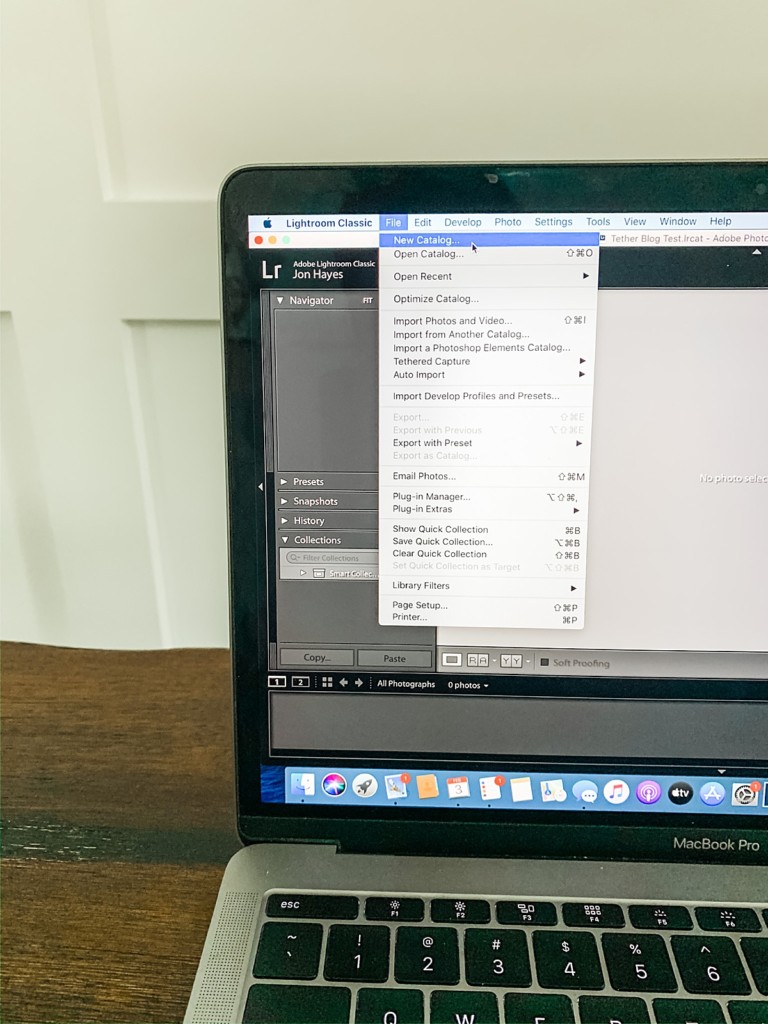
Step 1: Start by setting up your computer and plugging it in. Then open Lightroom. (Note: There is plenty of other software you can choose, but we use Lightroom for image organization and editing, so we choose to stick with that!)
Step 2: Create a new catalog in Lightroom.
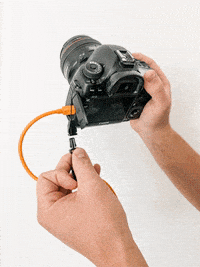
Step 3: Plug your Tether Tools cable into your camera
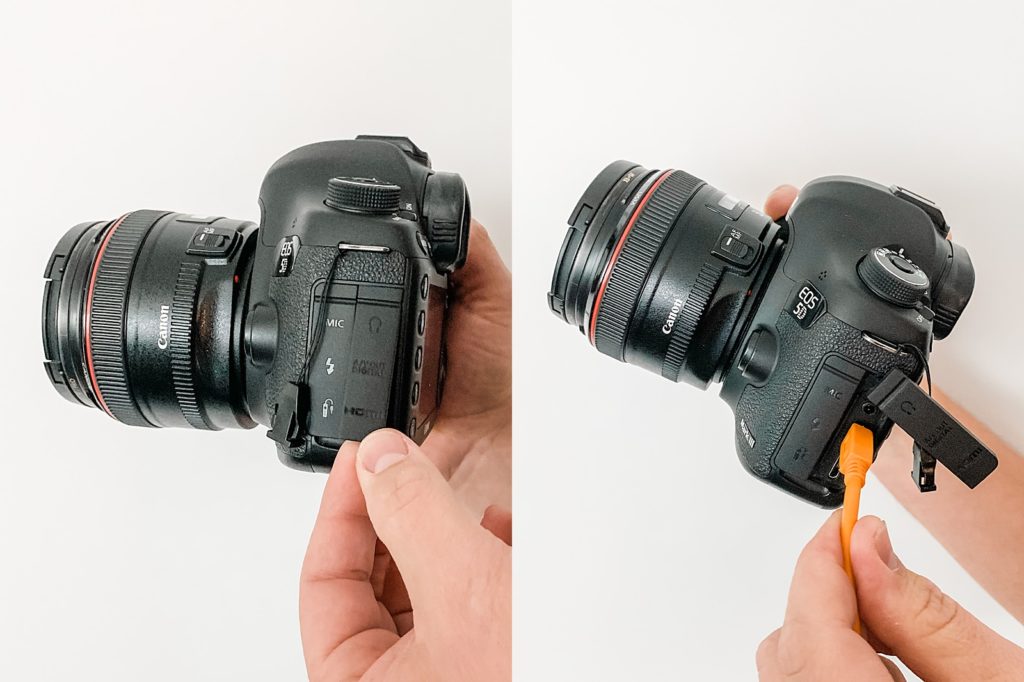
Step 4: Connect the Jerk Stopper to prevent the cable from being accidentally pulled out mid-session.
Step 5: Plug the Tether Tools cable into your computer and turn on the camera.
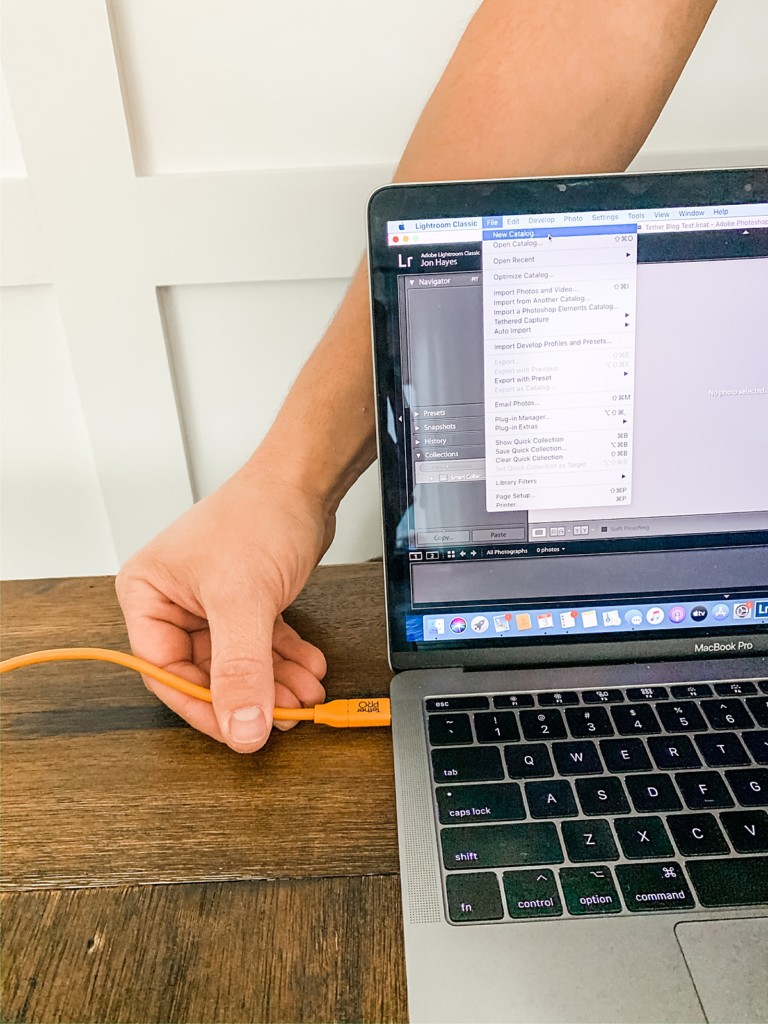
Step 6: In Lightroom, select File -> Start Tethered Capture
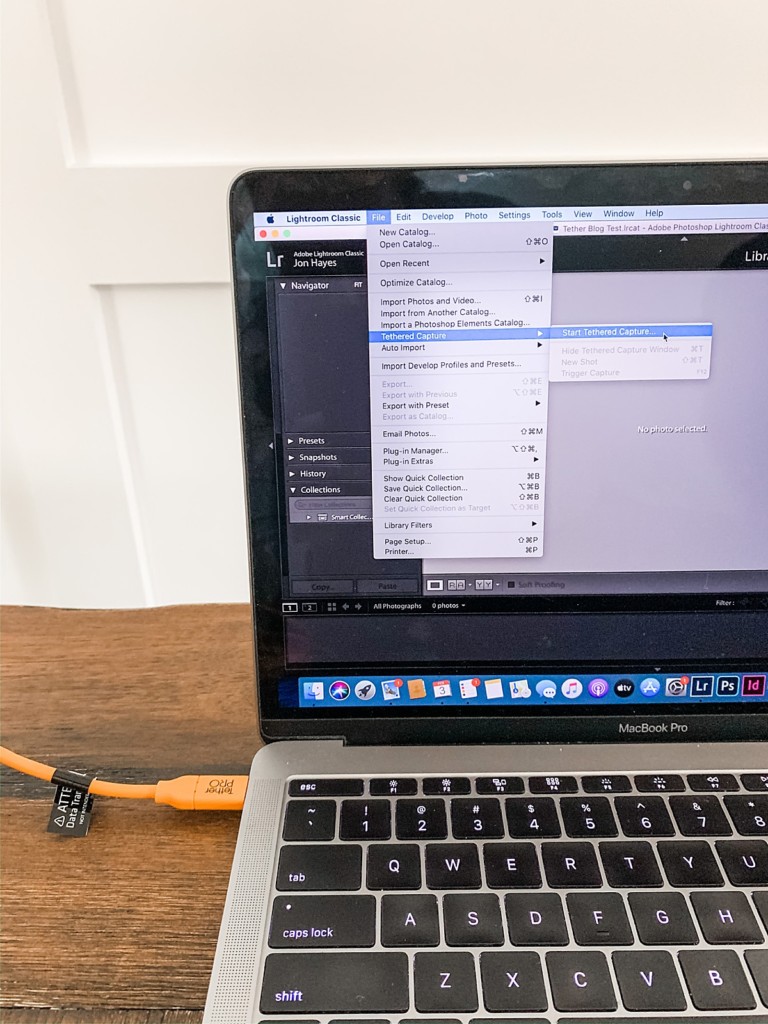
Step 7: Name your session and choose the destination for Lightroom to save the RAW files. (Note: You can save them directly to an external hard drive as well, just select that drive when you choose the destination.)

Step 8: Lightroom will detect your camera and a new toolbar will appear.
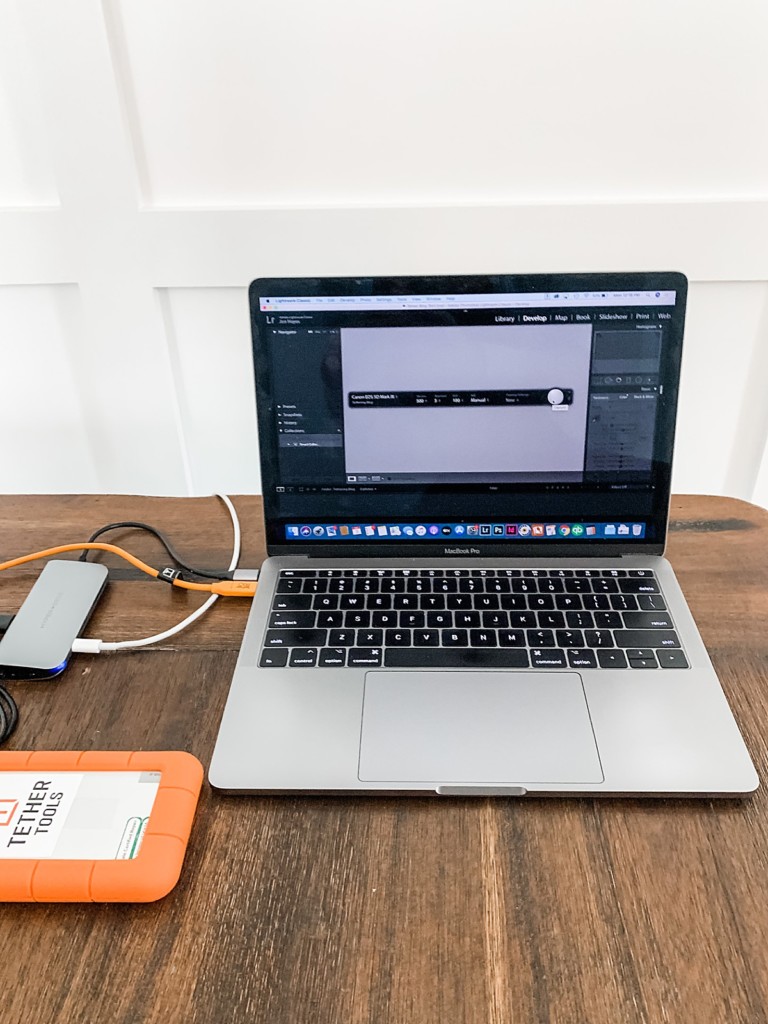
Step 9: You’re Ready to Shoot!
Step 10: Use the Lightroom Toolbar OR your on-camera buttons to change camera settings as needed. You can even use the toolbar in Lightroom to apply presets to images as they are taken!
Step 11: When the shoot is over, in Lightroom, select File -> Stop Tethered Capture.
That’s it!
Tips + Tricks
1. If you shoot with a card in your camera while shooting tethered, you’ll automatically have two copies of the images – one on the save destination you chose and one on the camera card. Yay for file backups!
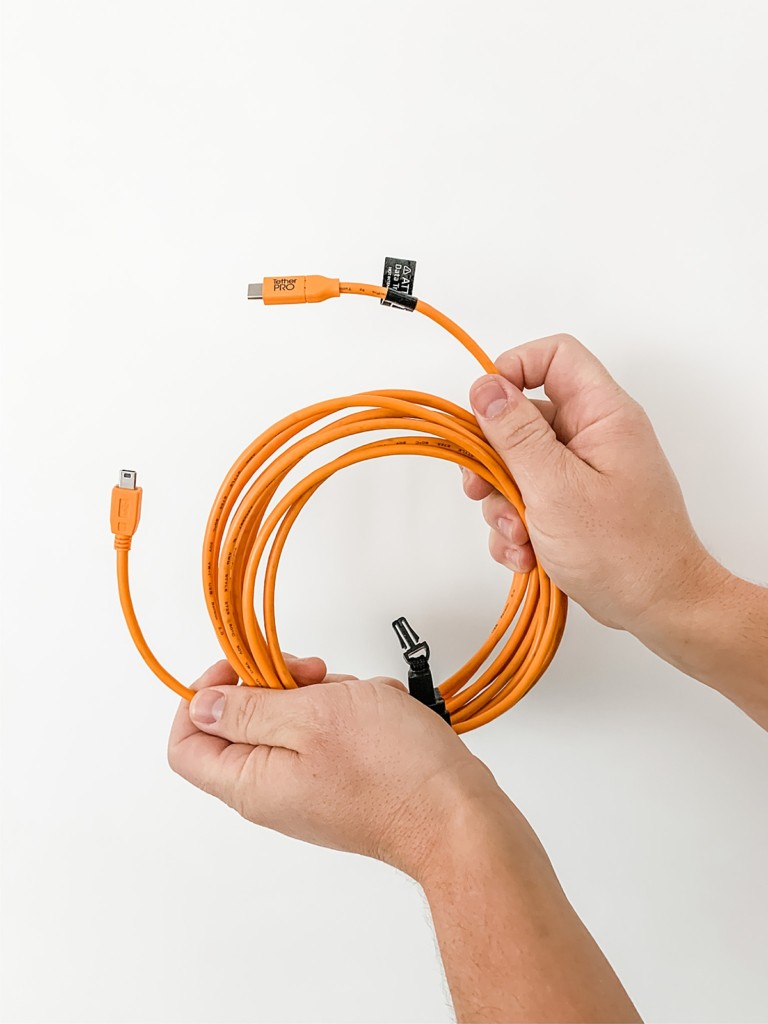
2. Make sure the Tethering Cable you choose has the right plug ends for your camera and computer. Here’s where you can grab the right cable for your camera:
Your camera make not listed? Try this helpful tool that tells you exactly which type of cable ends you will need!
3. Some computers (like our MacBook Pro’s) don’t give us all too many ports on our computer. We love this Hyper-Drive adapter which lets us have enough inputs for power supply, an external hard drive, the tethering cable, and even HDMI if we want to send the images to a separate large screen for our clients to view!
4. In addition to applying presets, you can also use the Lightroom toolbar to apply other edits to images live. Simply edit a test or sample photo, then choose ‘Same As Previous’ under the Develop dropdown menu on the toolbar and it will apply that same edit across all new images!
Visual Learner?
No problem, we’ve got you covered too, boo! Here’s a video of Jon walking you through the entire process of how to shoot tethered!
P.S. We are affiliates for some of the products you see listed which means we get a small commission when a purchase is made using one of the links included in this guide. It doesn’t cost you a dime more and in some cases even costs you less because of a special bundle or discount we’ve been able to snag for your benefit! We would never endorse products we didn’t use ourselves, so rest assured knowing these are our true recommendations!

This is an excellent tutorial and really de-mystified shooting tethered for me. Thanks – you both are so great for sharing!
Hey Meagan! So glad this was helpful for you! If there is other content like this that could be helpful in a tutorial format, please let us know! We always like to help with any pain points the greater community might be running into.